Showing posts with label Space Theme. Show all posts

Monday, June 22, 2020

Summer Fun Mini Themes: Star Wars Jedi Training Camp

One of my favorite things about these [many] days at home is our ability to follow the kids' interests on a whim and dig deeper. It's kind of like emergent curriculum for play. And that's why last week, the Sprout Scouts took off on an intergalactic adventure and enlisted in Star Wars Jedi Training Camp! The experience was out of this world...

S in particular is very into Star Wars. It shows up in his play quite a bit and I loved the challenge of creating a play theme out of that interest. When I happened across some amazing (and free) printable Star Wars art and activities from Fiddlesticks Education, I decided to run--er, fly with it! I was introduced to Fiddlesticks Education resources through a large nature based summer curriculum bundle I purchased on my own whim (and on major discount). I love planning, curating and creating materials for play and learning but I also love the ease of "one stop shopping" and the ability to skip some of that time consuming searching--especially now! I also love to be able to support fellow like-minded educators. Her watercolor work is absolutely stunning and I was particularly inspired by her Curious Kids Club to create a way the kids can keep track of their summer activities and accomplishments. Everyone was very excited last Friday to earn two of their first "trophies" in their Curiosity Cabinets--one for their study in robotics and another for their successful completion of Jedi Training Camp!


So, what exactly did we do at Jedi Training Camp? Well, we started off the week by adopting an Ewok! The boys each got to color, cut and paste their own little paper doll to play with and care for. There is something so fun and quaint about paper dolls. I have such nostalgia whenever we use or make them and the graphics I collected printed onto cardstock were just perfect for that.

S and Y were each presented with their own Intergalactic Passports. They used watercolors to decorate the cover and I told them each day we would visit three planets for activities. Their mission each day was to find the 3 planet pictures I had sneakily tagged around the house and yard and to glue the corresponding picture into their passports. Finding the planets became a favorite activity in and of itself!

Of course the boys needed light sabers to train with. I created those with sculpting balloons, recycled toilet paper tubes and plenty of duct tape. As you can imagine, there were many replacement balloons throughout the week! S even asked for a double sided light saber like Darth Maul at one point, so why the heck not?

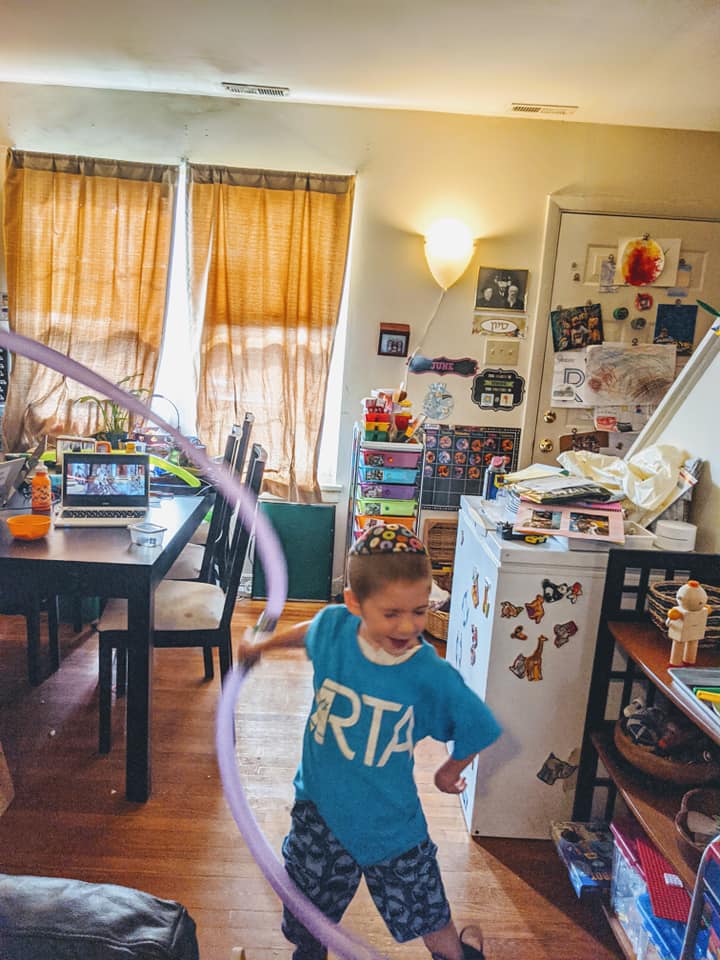

As you can see, S took his light saber Jedi training very seriously. One of our favorite (and most often repeated) activities last week was Jedi Training Light Saber Yoga. We used cards from Fiddlesticks Education and I highly recommend them, but you can just as easily make up your own moves and routines. The boys and I took turns pulling 3 cards from the deck at a time and holding each pose for about 10 seconds.


As you can see, this was really just a fun and playful mini theme. I think it made S feel particularly honored to see his interest taken into action last week. And the fun is continuing this week. We haven't quite returned to Earth yet, but we are back in our own galaxy as the Sprout Scouts enroll in Space Camp! But that's a post for another day--and until then...

Happy Playing!
Image may contain: indoor

Wednesday, July 24, 2019

More Out-of-this-World Space Themed Fun!

If yesterday's post on setting up your own Space Station Dramatic Play left you starry eyed, you'll love today's additional space themed activities: DIY NASA costumes for your aspiring astronauts and galaxy slime!

Per S's request to make costumes for our Space Station, I stopped by our local craft supply shop last night to pick up a couple of NASA orange (is that a Crayola color yet?) t-shirts for us to decorate this morning. I prepped each one with strips of thin black and silver duct tape and drew on my own version of a NASA logo with permanent marker. You could use fabric markers. You could use up-cycled white undershirts or whatever you have on hand. Duct tape and permanent marker won't make these the most laundry-friendly costumes over the long term, but since it's for dress-up, it'll do just fine!


S and Y used permanent markers to decorate their shirts. Tatty might have also gotten in on the drawing this morning as well! Next it was time to suit up and take off. S gathered some books and telescopes from our little space themed basket. He also packed along his Blueprints Book and grabbed a clipboard with Flight Plans printed from Pocket of Preschool's Space Station Dramatic Play Set. He has been very into dictating and navigating and recording various space missions. Y has been very involved in helping to count backward (and forward) and co-piloting our space shuttle. Even little C has gotten in on some of the fun and play!

We store some of our space themed books, props and materials in a small basket in front of our bookshelf.

Exploring Venus this morning...

Y has been carefully "taking notes" and documenting our space missions...


Y and S wanted C to wear a jet pack...
I'm not sure exactly what happened while we were on Venus, but Y came back to Earth in a horrible mood. He had a galactic tantrum the lasted for light years. We needed a little reset and maybe also some stress relief for Mommy and that was the perfect opportunity to make some Galaxy Slime!


To make your own batch of Galaxy Slime, you will need:


  • 4oz (half a cup) of clear glue or glitter glue*
  • 1/2 cup water
  • 1 tsp Borax Powder**
  • glitter

*I decided to double the recipe above and had only 1/2 a cup left of each clear glue and silver glitter glue, so I used both and S and Y generously mixed in additional rainbow glitter

**A little note on safety: If you prefer to not use Borax Powder in your slime, there are recipes online for Borax-free slime (though most use products that contain the same chemical). I have never experienced any chemical burns from using Borax, however I do recommend that an adult supervise and assist, that you follow the recipe carefully and that until the ingredients are fully incorporated and the slime has congealed, little hands use a spoon or fork to mix and only adults mix by hand. Wash hands thoroughly after play each time.

Directions: In a large mixing bowl, pour in your glue. In a separate bowl or cup, dilute your Borax Powder in your water. Pour that into the glue in your large mixing bowl and mix. Mix some more. Mix some more. Just keep mixing, mixing, mixing. You can mix by hand (see the note above about safety) and mix longer than you think it could possibly take, all the while wondering and worrying whether this will every become slime. It will. It is an incredibly forgiving and slow and magical process. You will first see lumps. You will then see froth and suds. Your goop will take on a cloudy color and then, all of a sudden, it will start to become stringy and sticky and then congeal into the perfect blob of bouncy Galaxy Slime! And then it's time for the real play to begin...

I used a 55% off coupon to treat the kids (and myself) to the Safari Ltd. Space Toob for some themed play accessories. The boys also like to use plastic knives with just about every kind of sensory play dough. Y was all done whining and crying once we got busy in the kitchen concocting our Galaxy Slime and smooshing every little lump out of that ball of goop really helped calm my frayed nerves as well. So did the second pot of coffee I made once everyone went down for a nap...

When you are done playing with your slime, it can be stored in a ziplock bag or airtight container to save it between play sessions. I've refrigerated it before to keep it longer, but there's no need to do so.

It's true, there's no place like space and we've got a lot more exploring to do in the days to come! Until then...


Happy Playing!


Tuesday, July 23, 2019

A Peek Inside Our Playroom: Space Station Dramatic Play

There's no place like outer space! I think S and Y could both count backwards from 10 to 1 and blast off before they ever learned to count forwards. Stars, planets, astronauts and space ships are a beloved theme for kids of all ages. We've just finished off a major heat wave here and I am glad to see it go. Today's temps are 30 degrees cooler than yesterday's high and it's been steadily raining on my dehydrated garden all day. But knowing that today was going to be a soggy day and yet another in a row of days we couldn't be outside for long, I wanted to have something fun to occupy everyone.
We've still been having fun here in our Build-a-Car Auto Shop and I'm not quite ready to tear it down and do a complete revamp. And with the materials and tools we already had set out, a little tweaking to the type of transportation in mind and a few additions, turning our living room into a NASA Space Station Dramatic Play Center was the perfect next step in our Sprout Scouts play adventures. We've explored space themed activities here before and we even attended a Rocket Day event at one of our local library branches earlier in the summer. Dramatic play is a favorite way to engage in learning about nearly any topic in our house and when it comes to getting that set up and organized, I love the Space Theme Dramatic Play set by Pocket of Preschool.

Outer space is a theme that is as vast and expansive as, well, outer space! You could get really into setting up a play area and learning activities with this theme or you could keep it simple and engage the help of your young astronauts in training, as I did. I did spend a bit of time in the evening yesterday gathering my printed materials, making some jet packs from recycled water jugs, duct tape and ribbon, preparing our control panel and setting out some large paper and art supplies to make a Space Station sign for Morning Work.

The boys began the day by adding stickers, rocket ships and coloring a sign for the front of our Space Station. Next, it was time to set up our space shuttle. We used our puppet theater and a couple of chairs. You could also make the front of your space station with a tri-fold presentation board and old car seats as Pocket of Preschool did in her classroom. I really love the idea of involving the boys in setting up our dramatic play adventures as much as possible. For one thing, I need the help! It also gives them ownership of their play and learning experience while engaging their focus a lot better than when I set everything up in advance.


Setting up very little this time was partially intentional and partially because I didn't exactly have everything prepared when I decided to do this at the last minute yesterday. And what I learned yet again today is just how OK that is! Even in a classroom setting, it is OK to gradually implement a new play theme and to take a little help from your little friends.

Y and S both helped make some telescopes for viewing and observing different planets out of recycled cardboard tubes, duct tape and washi tape. Incidentally, Y's telescope also functions as a trumpet...


Both boys love the jet packs. I don't always make or have enough of our props and materials for each child to have his/her own, but in this case I am glad I saved 4 empty water jugs so we'd have one for S and Y. And since they are made predominantly from recycled materials and the rest from supplies we already had, this was a very budget friendly play theme to set up. I also recycled the cardboard backing from a large easel pad to make our control panel. I covered it in tinfoil and glued on images from the printed set. Alternatively you could also use stickers and create your own buttons and images from printed pictures, construction paper, draw with permanent marker or even glue on recycled bottle caps.

S asked for help to read the names of planets and every time we choose a destination, he "presses" that "button" first. Then both boys count back from 10 and blast off! Next they disembark from their space shuttle, put on their jet packs (with a little help as needed) and go exploring! We make up different things we see on each planet before getting back into the ship and heading back toward Earth.

Donning his jet pack...

S is moving around in a "bouncy" way because there is no gravity here on the moon!

Ready for takeoff!

Instead of having everything out and ready to go where our playroom was a means to an end, this is simply the beginning! We have a lot of exploring to do. S has already asked to make some astronaut costumes. We've decided we want to make some planets and decorations for our space station to make it look more like the solar system. Both S and Y want to know more about the planets and space, so we headed to the library to gather some books. Stay tuned for more play activities that are simply out of this world, and until then...

Happy Playing!

Wednesday, November 8, 2017

Days of Creation Stations: Day 4 Moon, Stars & Sun

We're back! And it seems we brought along the northern weather with us. It's cold and rainy here and with the recent time change, it's dark in the afternoons, too! Perfect time to play indoors and to get back to our Days of Creation Play Stations, which brings us to Day 4, the Creation of the moon, stars and sun! Indeed, there are so many great play activities you can do with a space theme. With a little preparation and imagination, you can spend an afternoon in play that will take you out of this world! In the interest of being a bit more present in their play and also a bit more protective of their privacy, I'm including fewer photos of my boys' adorable little faces (biased opinion, I know) and more photos of the activities themselves. Here's a peek at our day of space themed adventure through process art and sensory play:

I always introduce our afternoon Days of Creation Play Stations by going through the 7 days in song along with some of our related play materials and previous art projects S has made. I love including his artwork in this and he feels proud to see it on display.

S made this one last year with our Bereishit unit using washable black marker, a spray bottle of water, stickers, pre-cut paper shapes of the sun and moon and glue.

S's preschool class made this great hanging book of the Days of Creation this year. We use it daily to show what day of the week it is and it is also a great material to add to our play stations.


In advance of our Day 4 Play Stations, I prepared this galaxy sensory bottle. I confess that I have no idea what baby oil is for. I'm on my second baby and to date I have only ever used baby oil for removing stubborn sticky spots left on the skin from bandages and for sensory bottles. That is combined with water, red and blue food coloring to your desired shade of purple and silver glitter to create a sparkly night sky in a bottle. I was, um, quite generous with the silver glitter! I just love watching it adhere to the tiny oil bubbles and the boys both get a kick out of observing it as it is shaken (usually by S) and as it swirls and settles. I added some star stickers to the outside of the bottle and some duct tape to secure the lid, because I love glitter, but not all over my living room rug!


Our newly revamped art center has also been a great venue for inspiring artwork in the theme of the moon, stars, and sun. Y had some fun exploring fingerpaints and color mixing with this mess-free paint-in-a-bag activity. It's a great activity for tummy time. It can also be used sitting either hung from a vertical surface for use with hands or set on the floor to explore with hands and feet! Slip a piece of white paper or cardstock inside a ziplock bag and add a squirt of your desired colors of paint (we used blue and yellow). Seal tightly and if you wish, add a layer of tape to secure. Please supervise your little ones with plastic bags.

After Y was done playing and exploring, I took out the paper from inside the bag and it was quite thickly covered in paint--perfect for making prints! I made a couple of prints on large white paper and left both paintings to dry. His "original" was added to our wall (or door) of fame! And the remaining sheet of prints was upcycled into a "moon" and "sun" for S to glue on to the next page of our Days of Creation Process Art Book:

Our Day 4 page is ready for the next artist in line. Y helped with the "moon" and "sun," and S will get to glue them on along with adding some star stickers and foam shapes.


S was so drawn in to our current art center options. He especially loved "carefully carrying" this frame with a copy of Van Gogh's "Starry Night" to his little table to use as inspiration alongside chalk pastels and a sheet of white paper. He tested out the chalk pastels on their side to create wide smudges and upright for darker lines. He used his fingers to blend colors and got to experience hands-on color mixing right before his eyes! Chalk pastels are a great art material for early budding artists. They produce a result without having to press very hard and are easy to manipulate for small hands. We found ours quite inexpensively at our local Five and Below. 


To include an element of pre-writing, I set up this constellation picture with star stickers and white chalk and crayons for both boys, featuring the first letter of their names. Y needed my help to connect the stars, but will enjoy (with my help and supervision) using chalk on the black paper. S with some modeling and support will be able to connect his own stars and explore the chalk and crayon on black paper.


Lastly, I got out our bag of kinetic play sand and some moon and star cookie cutters and plastic wands--the perfect setup for a "moon sand" sensory bin that S will surely enjoy digging into while I tend to dinner preparations later on. We will be back with more soon and until then...

Happy Playing!


Friday, December 2, 2016

Rosh Chodesh Kislev: Welcoming the New Month and Chanukah!

We've always loved our "moon rocks" here!
They're really made from crumpled up tinfoil (shh)
but he still loves a good game of Rosh Chodesh
Moon Rock Toss, and now that he's older
he sometimes even makes it in the basket!
Chodesh Tov! Yesterday, in addition to marking the first day of December, also marked the beginning of the new Jewish month of Kislev. As I've written about before, we try to make the beginning of a new Jewish month a little extra special here. We might have a celebratory playdate or a special snack. Sometimes we dress in nicer clothing, sometimes we take a special family field trip and we also take some time to introduce anything exciting that may be coming up in the month ahead. This month we will celebrate Chanukah. Last night seemed like the perfect time to rotate in some of our favorite Chanukah materials and books.


My little guy woke up this morning with all his usual enthusiasm for a brand new day and a little extra excitement for the new month. I'd already set out this white coffee filter "Blue Moon" project as his work table. All you need is a black washable marker, a white coffee filter and either a spray bottle of water or a small dish of water to dip the coffee filter in after your little doodler is done having at it with the marker. You may want to forewarn sensitive artists that their artwork will be drenched in water and change so that they are not surprised to see an intricate picture disappear! When they are done, spray with or dip the coffee filter in water and watch the color run. I usually fold it in half a few times and then lay out on a couple of paper towels to dry. When dry, it somewhat resembles a blue moon--and Rosh Chodesh comes only once in a New Moon!
finished sample

Our Chanukah Observation Station has also received a lot of play and attention today. He is especially enjoying practicing with dreidels and using real candles to work the fine motor skill of putting candles in a menorah (and taking them out). Now we just have to work on him not blowing out the Chanukah candles! (That's likely the result of my husband recently having a birthday here and likely the inspiration for a future candle sorting activity--which candles do we blow out and which do we let burn to the bottom?)
Chanukah Observation Station

Digging In to Chanukah themed fun!

Chodesh Tov & Happy Playing!


Monday, August 15, 2016

Mad Science Monday: Fizzy Planet Fun

I never get tired of exploding science experiments! And truth be told, I've never met a kid who does either. Baking soda and white vinegar are common household ingredients that are likely already in your pantry and ready for fun. That said, almost any day can become a Mad Science day, even on the fly. Added bonus: self cleaning science--if it gets on the carpet, no worries and you likely just lifted that old grape juice stain as well!

During a recent Space Theme, I came across this creative twist on the classic baking soda and vinegar chemical reaction on this wonderful blog. My son and I conducted our own Fizzy Planet Jupiter experiment:

We mixed about a cup of baking soda with about 1/4 cup of water and several drops of red and yellow food coloring to form our baking soda dough. The dough is quite crumbly and pleasantly cold to the touch, but given the right amount of water (you may need to add a bit more) can be molded into a ball.
Half the fun is just playing with the dough!

And the other half of the fun is using a condiment bottle to squeeze white vinegar and watch it 'splode again and again!